This is part 6 of the series of post that I am doing about building a Continuous Integration Environment using Sitecore, TeamCity, Octopus Deploy, and Unicorn.
Part 1 – Setting Up TeamCity
Part 2 – Setting up OctopusDeploy
Part 3 – Setting up SQL Server for Sitecore
Part 4 – IIS
Part 5 – Octopus Environment and Deployment Configuration
Part 6 – This post
Part 7 – OctopusDeploy Project
Part 8 – Sitecore Item Synchronization using Unicorn
Part 9 – Displaying Build number on Sitecore Home Page & Tagging Git
Part 10 – config transformations using Octopus Deploy
Part 11 – Deploying to a Sitecore Multi-Instance Configuration
Assumptions
Just a quick reminder
All the servers are running Windows Server 2012 R2.All the servers are stand alone, and are not part of a domain. All servers have C and D drives.
Everything that is documented here and on subsequent posts are based on freshly installed Windows Servers.
As detailed in Part 1, you will need to modify the Local Security Policy so that password don’t expire after 42 days
Getting Started
nuspec
Before preparing the TeamCity project a few steps are needed. The point of the build is to produce a NuGet Package. So the first requirement is to create a nuspec file.
This is the nuspec file I use
<?xml version="1.0"?>
<package >
  <metadata>
    <id>MyProject</id>
    <version>1.0.0</version>
    <title>MyProject</title>
    <requireLicenseAcceptance>false</requireLicenseAcceptance>
    <description>NuSpec file</description>
    <releaseNotes>Summary of changes made in this release of the package.</releaseNotes>
    <copyright>Copyright 2016</copyright>
  </metadata>
  <files>
    <file src="App_Config\**\*.config" target="App_Config" />
    <file src="Assets\**\*.*" target="Assets" />
    <file src="bin\*.dll" target="bin" />
    <file src="Views\**\*" target="Views" />
    <file src="default.css" target="" />
    <file src="default.htm.sitedown" target="" />
    <file src="default.js" target="" />
    <file src="Global.asax" target="" />
    <file src="Web.*.config" target="" />
    <file src="Web.config" target="" />
    <file src="webedit.css" target="" />
    <file src="*.ps1" target="" />
    <file src="Unicorn\**\*.*" target="Unicorn" />
  </files>
</package>
I do not worry about setting the version tag, as TeamCity will correctly set the version number in the generated NuGet file, and a build feature will set the assembly info.
I am also including all the transformation config’s as these files will be needed by Octopus.
There is a postdeploy.ps1 file that will delete all the environment specific transformaiton files that Octopus will automatically run.
TeamCity
The Visual Studio solution is using Node and Gulp. Therefore before starting, you have to install node onto the TeamCity server, and include the Node plugin.
Gulp needs to be installed correctly. After the node installation has completed, run the following from the node command prompt.
npm install gulp -g
This will install gulp globally on the server.
Gulp and its plug-ins are a topic for another day.
Finally install the node plug-in for TeamCity. Full instructions are given on the GitHub page. Now we are ready to proceed.
TeamCity Project
I am basing this on the fact that I am using a Stash Git repository. This process should work with any Source Control Repository, but mileage may very on your environment.
Log on to TeamCity
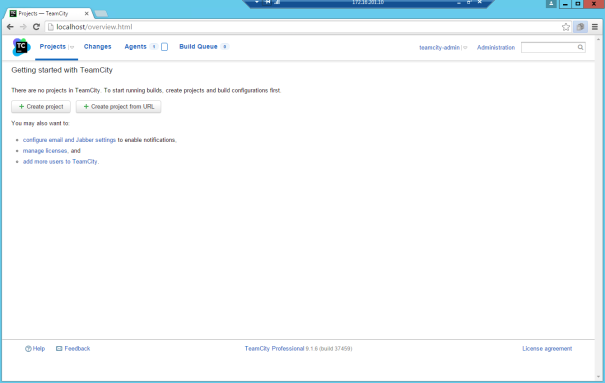
This is TeamCity with no projects. If you are using an existing TeamCity solution, there are small changes to be made initially.
Create Project
Click Create Project
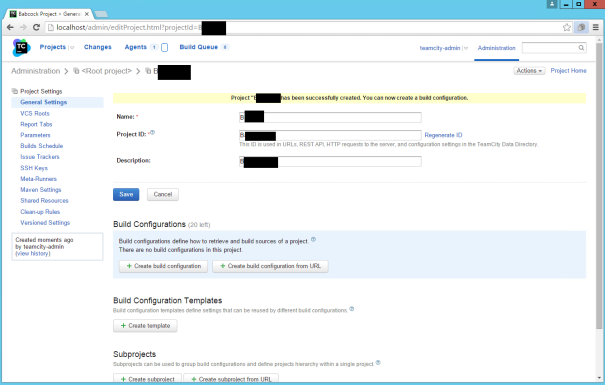
Give the Project a Name and a description. The Project ID is created automatically
Click Create
Once your TeamCity project is created, then you need to create a build configuration. Click Create build configuration
Give the configuration a name, and description. The build configuration ID will be generated automatically.
Click Create
Create VCS Root and Build Trigger
Next you are prompted to create the VCS to be used
Enter the details to connect to your Source control. Just remember to be careful about the branch to use.
Test the connection, and if successful, click Create
We now need to create a build trigger that will start the build process whenever a check-in occurs.
From the project select Triggers, and click New trigger
Click Show advanced options
Click Save, to return to the Project home page.
Build Steps
Build Step – Build Solution
From the project build context menu, click Edit Settings
Click Add build step
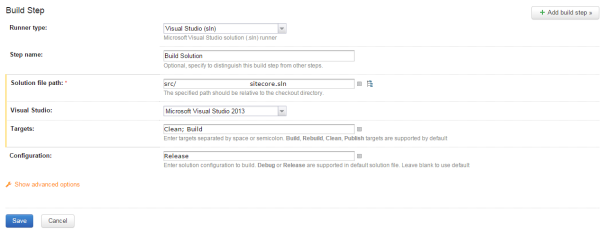
Select the runner type as Visual Studio.
Give the Step name a meaningful name.
Select the path to the solution file.
Select the version of Visual Studio.
Enter the build targets
Enter the configuration.
There are advanced options but this is all that is required.
Click Save
Build Step – Run Unit Tests
From Build Steps, click Add build Step
The Runner Type is NUnit.
Give a meaningful step name.
Select the correct NUnit Runner.
Enter the location to where the test project(s) are located
Click Save
Build Step – Install Gulp packages
This step is to get TeamCity to restore all the gulp packages that the solution uses.
From Build Steps, click Add build Step
For Runner type select Nodejs NPM
Give the step a meaningful name
The only command needed is to tell Gulp to install all the packages specified in the package.json file
Click Save
Build Step – Run Gulp
This step is to execute the gulp task as defined in the gulpfile.js
From Build Steps, click Add build Step
The Runner type is Gulp
Give the step a meaningful name
Select NPM package from project
Specify the Gulp Tasks to run
For my solution I pass in the current TeamCity build number as there is a gulp process that uses this number to update the package.json file
Click Save
Build Step – Generate NuGet Package
This step will generate the NuGet file from the solution nuspec file, in preparation for the file to be submitted to Octopus Deploy
The Runner type is NuGet Pack.
Give the step a meaningful nmae
Specify the version of NuGet that has been installed into TeamCity to use.
Specification files is the location of the nuspec file
For version is supply the TeamCity variable %build.number%
Click Save
Build Step – Publish NuGet Package
This step will push the newly generated NuGet file to Octopus
This step needs the API Key from Octopus Deploy. The API Key was created in Part 2. Once the API key is created, it cannot be retrieved. If you have lost the API Key you will need to create a new one.
From Build Steps, click Add build Step
The Runner Type is NuGet Publish
Give the step a meaningful name
Specify the version of NuGet that has been installed into TeamCity to use.
Select the package that was built in the previous step
Enter the API Key from Octopus
Enter the url of where the Package is to be uploaded to
Click Save
Build Step – Create Release and Publish
This final step will be to inform Octopus Deploy that you want to start a new release. Please note that we have not yet build the Octopus Deploy process. That will be performed in the next post, but you can configure the step now. Just don’t push anything into your source code repo or it will start the build.
This step needs the API Key from Octopus Deploy. The API Key was created in Part 2. Once the API key is created, it cannot be retrieved. If you have lost the API Key you will need to create a new one.
From Build Steps, click Add build step
The Runner type is OctopusDeploy: Create release
Give the step a meaningful name
Specify the Octopus URL.
Enter the API key
Enter the Octopus Deploy project name.
Pass in the teamcity release number
Specify the Channel to use
Specify what environment to deploy to
Click Save
Depending on how you build the Octopus Deployment project you may need to include an additional step here, but I will be be configuring the solution automatically deploying to this environment as soon as the release enters this phase. Because of this no other steps are necessary.
Next Steps
The TeamCity project is now ready to go. Next need to build the Octopus project that will deploy Sitecore and the solution.
If you want to test that the TeamCity project is working, disable the final steps of pushing to Octopus and starting the deployment process. Just remember to enable the steps once testing has been completed.


Leave a comment